How to Fix Double Crochet Tension Problems & Row Height
How the Golden Loop controls double crochet height, whether you are a Yanker, Rider or Lifter, and how to fix loose posts and tight tops.

7 min read
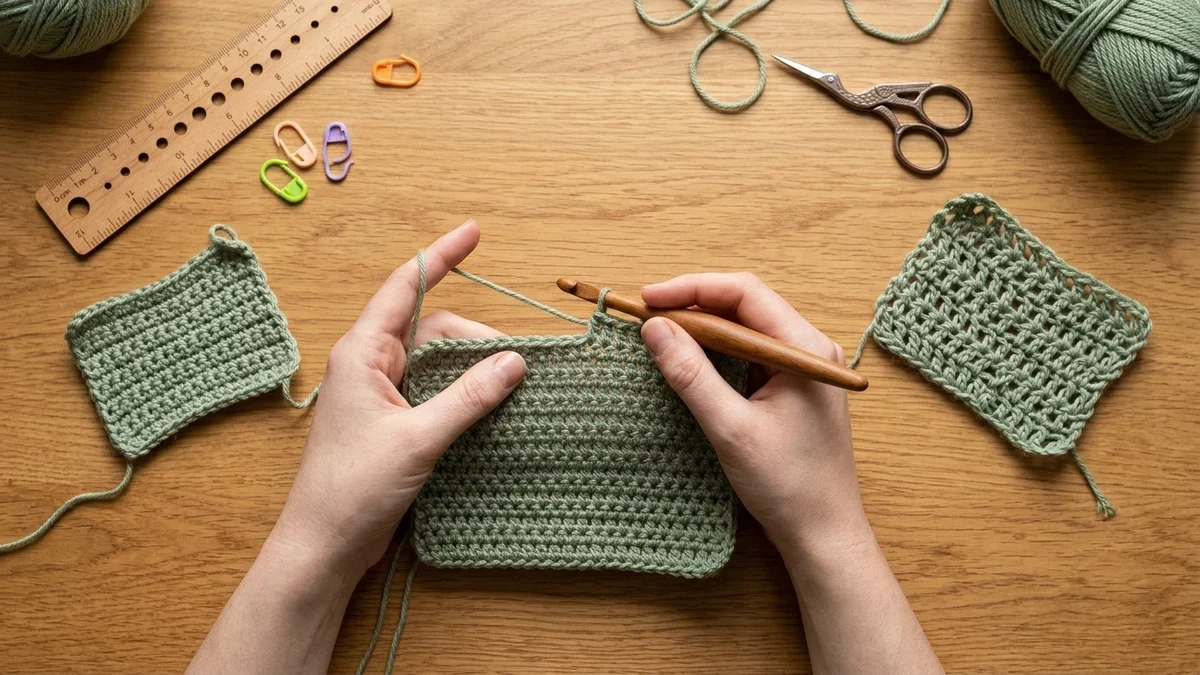
In double crochet (dc), tension problems almost always fall into two separate categories: horizontal stitch width (your piece is too wide or too narrow) and vertical row height (your stitch count per 4 inches matches the pattern, but your rows are too short or too tall). To fix stitch width, adjust your crochet hook size and always slide each new loop back onto the full cylindrical working shaft of the hook rather than tightening it inside the narrow tapered throat. To fix row height without changing your stitch width, adjust your Golden Loop—the height to which you pull up the loop right after inserting your hook into the stitch below.
US vs. UK Terminology Note: This guide uses standard US crochet terms. In UK crochet patterns, double crochet (dc) is called treble crochet (tr), and gauge is called tension. See our US vs. UK crochet terms guide for full conversions.
Diagnostic Table: 6 Common Double Crochet Tension Problems & Instant Fixes
Not sure whether your hook, your yarn hand, or your loop height is causing the issue? Match what you see on your swatch below, or enter your swatch measurements into our interactive swatch troubleshooter:

What Your Fabric Looks Like | Root Cause | Immediate Fix |
|---|---|---|
1. Swatch is too narrow & stiff ( | Hook is too small, or loops are being tightened inside the narrow hook throat | Go up |
2. Swatch is too wide & floppy ( | Hook is too large, or working yarn has too little finger friction | Go down |
3. Stitch width matches, but rows are too short ( | "Yanker" Golden Loop (pulling the initial stitch loop down tight) | Consciously lift your Golden Loop higher (or switch to Extended DC) |
4. Stitch width matches, but rows are too tall & gappy ( | "Lifter" Golden Loop (pulling the initial stitch loop up too high) | Keep your hook parallel to the top edge of the row ("Rider" position) |
5. Bottom edge curves like a rainbow ( | Starting foundation chain was worked tighter than the | Make the foundation chain with a |
6. Loose, loopy gaps along one or both side edges |
| Use a |
Fix #1: Control Stitch Width by Sizing Loops on the Hook Shaft
If you struggle with tight, squeaky stitches that are hard to insert your hook into—or if your stitch width varies from row to row—the culprit is usually where the loop sits on your hook.

As explained in our complete guide to hook anatomy, a crochet hook's millimeter size (5.0 mm, 5.5 mm, etc.) is measured on the cylindrical working shaft (shank) just behind the throat—not on the tapered neck right behind the hook tip:
- The Throat Trap: If you keep your loops pinched down inside the narrow throat while yarning over and pulling through, a
5.5 mmhook will actually produce4.0 mmstitches. - The Shaft Habit: After every
yarn over and pull through 2 loops, let the remaining loop slide half an inch back onto the full-diameter working shaft before making your next yarn over. The shaft acts as a built-in sizing gauge for every stitch.
Fix #2: Master "The Golden Loop" to Control Double Crochet Row Height
Have you ever made a gauge swatch where your stitch count across 4 inches is spot-on, but your row count is off by 1 or 2 rows? Changing your hook size will ruin your correct stitch width. Instead, you need to adjust The Golden Loop.
Coined by crochet designer Vashti Braha in her 2011 Designing Vashti newsletter (and later popularized across the crochet community by educators like Esther Dijkstra of It's All in a Nutshell and Hannah Cross of Dora Does), the Golden Loop is the loop you pull up right after inserting your hook into the stitch below (the middle loop of the 3 loops on your hook in double crochet).

Braha identified three natural stitcher styles based on how high you draw up that Golden Loop:
- The Yanker (Short Golden Loop → Squished Rows):
- What Happens: After pulling up a loop through the stitch below, you instinctively tug the working yarn downward,cinching the loop tight against the top of the row before yarning over.
- Result: Short, dense double crochet stitches with too many rows per 4 inches and stiff garment drape.
- The Rider (Balanced Golden Loop → Standard Row Height):
- What Happens: You draw the loop up until your hook shaft sits naturally parallel to the top edge of the row, letting the loop ride smoothly onto the full diameter of the shaft without tugging down or pulling up.
- Result: Balanced, uniform double crochet posts that match standard pattern row gauges (
~8 rows per 4 inchesin worsted yarn).
- The Lifter (Tall Golden Loop → Tall, Airy Rows):
- What Happens: You angle the hook tip upward and lift the Golden Loop high above the previous row before yarning over to pull through 2.
- Result: Extra-tall, open double crochet posts with fewer rows per 4 inches and wider vertical gaps between stitches.
How to Use the Golden Loop to Match Any Pattern:
— Need taller rows (fewer rows per 4 inches)? Channel your inner Lifter and draw that second loop up
2–3 mmhigher before completing the stitch.— Need shorter rows (more rows per 4 inches)? Adopt a Rider or slight Yanker height to compact each post vertically without changing your hook size!
Fix #3: Balance Friction in Your Non-Hook (Yarn) Hand
Your hook hand forms the stitches, but your non-hook hand acts as the tension brake on the working yarn. Every finger the yarn touches adds friction:

- If Your Stitches Are Consistently Too Loose: Add one extra wrap around your pinky finger (or weave the yarn over-under-over across your ring, middle, and index fingers) so the yarn doesn't slip forward unchecked.
- If Your Stitches Are Consistently Too Tight: Unwrap the yarn from your pinky and let it glide in a simple S-path (under your ring and middle fingers, then over your index finger). Also check that your skein is feeding freely from a yarn bowl rather than tugging against a tangled center pull.
Fix #4: Prevent Mid-Project Tension Shifts
Even experienced crocheters notice that a blanket or sweater started on a stressful Monday evening can look slightly tighter than rows worked on a relaxed Saturday morning:
- Always Warm Up on 10–15 Practice Stitches: If you are returning to a fitted garment or heirloom blanket after a break, work a quick 2-row scrap swatch (or check your last completed row with a ruler) so your hands settle into rhythm.
- Never Swap Hook Brands Mid-Project: Two hooks both stamped
5.0 mm (H-8)can have different throat tapers (inline vs. tapered) and surface friction (matte aluminum vs. polished wood). Keep the exact same hook with your project until the final border is done. - Measure Gauge Early and Often: Don't wait until Row 80 to check your width! Lay your project flat on a table every 10 to 15 rows and measure your gauge across the center 4 inches.
Frequently Asked Questions (FAQ)
Why is my first row of double crochet always tighter than the rest of my blanket?
A starting chain has no fabric underneath to stabilize it, so most crocheters pull each chain loop slightly tighter than their regular stitches. Always work your foundation chain with a hook 0.5 mm to 1.0 mm larger than your main project hook, or start with a chainless Foundation Double Crochet (FDC).
Does wet blocking fix uneven double crochet tension?
Wet blocking (for wool, cotton, and plant fibers) or gentle steam blocking (for acrylic) helps minor loop variations relax and settle into an even grid. However, blocking cannot fix a major mid-project gauge shift caused by changing hook sizes or switching from a tight "Yanker" loop to a tall "Lifter" loop.
Why are my turning chains bulging out on the side of my double crochet rows?
A traditional 3-chain turning chain (ch 3) is often slightly taller than a Rider's or Yanker's double crochet post, causing it to bow outward into a bump on the side edge. Switch to a 2-chain turning chain (ch 2) or use a chainless standing / stacked single crochet at the start of each row.


Questions & notes
No comments yet
Sign in or create a free account to comment under your profile and keep track of your replies.
Your email address is never published. Comments are moderated under our Community Guidelines; see our Privacy Policy for how we use your details.