Why Is My Crochet Blanket Turning into a Triangle? How to Find and Fix Missing Stitches
Why double crochet blankets narrow or flare, how fast one missed stitch adds up, and when to block, add a border or frog.

13 min read

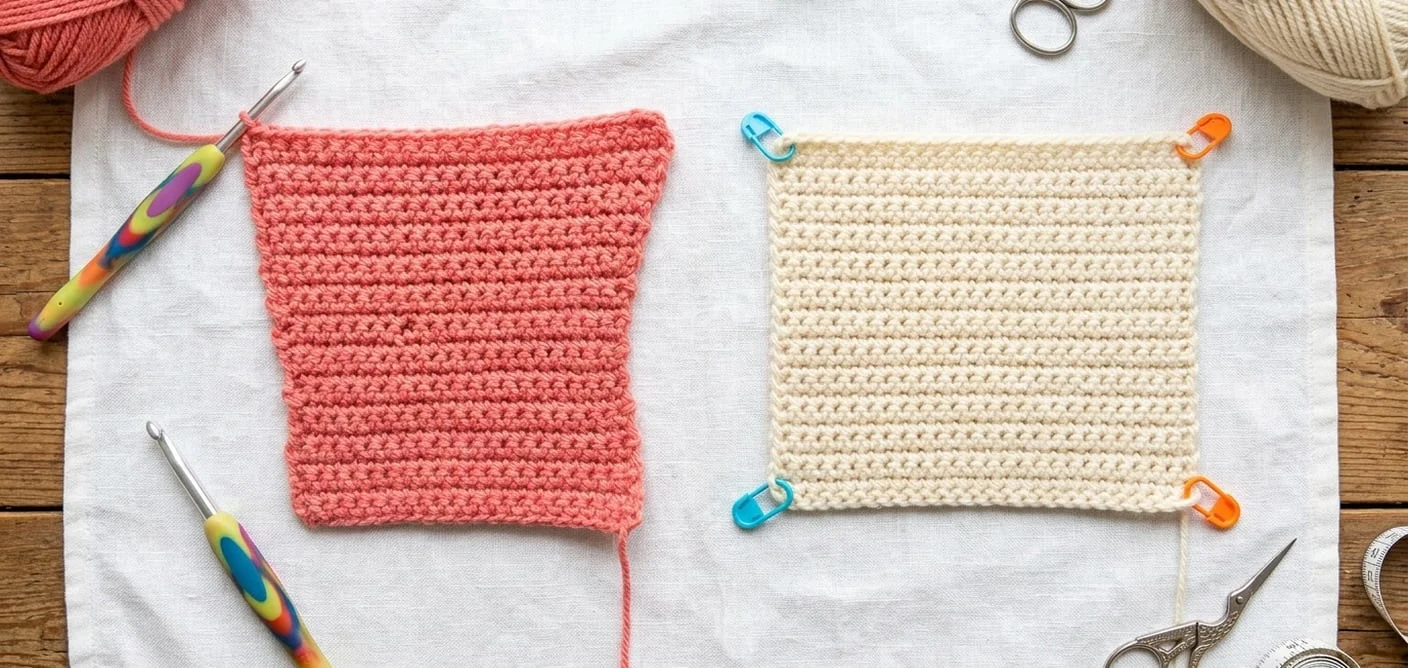
Almost every crocheter remembers the moment they spread their very first blanket across their lap, smoothed out the fabric, and realized the sides were sloping inward like a stone pyramid. You started with a foundation row wide enough to cover a sofa cushion, yet ten rows later the working edge barely covers your knees. Or perhaps the opposite has happened: one side is flaring outward like a fan while the other side leans in, turning a simple rectangular throw into a lopsided parallelogram.
When a double crochet blanket changes width from row to row, the cause is rarely tension alone. Even a noticeable shift in hand tension usually changes the width by only half an inch to an inch across a baby blanket. When a blanket steadily narrows into a triangle or widens into a trapezoid, stitches are either disappearing or multiplying at the very ends of your rows.
In this troubleshooting guide, we will look at the exact stitch anatomy behind missing and extra double crochet stitches, calculate how quickly a single missed stitch compounds across a project, walk through the two-marker system that makes stitch loss far less likely, and help you decide honestly when a slightly skewed blanket can be rescued with a border versus when it needs to be frogged.
US vs. UK Terminology Note
Throughout this guide, we use US crochet terms, where double crochet (dc) refers to the tall stitch begun with a single yarn-over (yo, insert hook, yo, pull up loop, yo, pull through 2, yo, pull through 2). In UK crochet terms, this stitch is called a treble crochet (tr). If you are following a UK pattern, the row-end mechanics described here apply directly to your treble crochet rows. For a full side-by-side reference, visit our US vs. UK Crochet Terms Guide.
The Two Anatomical Culprits Behind Changing Blanket Widths
In a standard row of single crochet, every stitch sits upright with a clean, horizontal "V" right on top of its post. Double crochet is different. Because a double crochet stitch is roughly three times taller than a single crochet, traditional patterns use a turning chain of 3 (ch 3) at the start of each new row to bring the hook up to working height, and they count that ch 3 as the very first double crochet of the row.
That single design rule—counting the turning chain as a stitch—creates two mirror-image traps:
- At the beginning of the row: Because the
ch 3already counts as Stitch #1, you must skip the first stitch at the base of the row and put your first real double crochet into the second stitch. - At the end of the row: Because the previous row started with a
ch 3that counted as a stitch, your final double crochet of the current row must be worked into the top chain of that turning chain—not just into the last standard double crochet post.
As noted in beginner troubleshooting guides by Make & Do Crew and Craft-a-Boo, getting either end of that equation backward by even one stitch per row changes your stitch count on every single pass.
Culprit #1: Why Your Blanket Gets Narrower (The Hidden Turning-Chain Top)
If your blanket is shrinking into a triangle, you are losing one stitch at the end of every row. Here is why that final stitch is so easy to miss:
When you work across a row of double crochet, your eyes naturally look for the plump horizontal "V" loops sitting along the top ridge of the fabric. As you reach the end of the row, you work a double crochet into the last full-sized "V" and feel as though you have reached the edge.
However, tucked just beyond that last full stitch is the ch 3 turning chain from the row below. Because a turning chain curves around the corner of the row and gets pulled downward by the stitch next to it, the third chain tilts sideways down the outer edge of the blanket. It does not look like a flat top "V"—it looks like part of the side border.
When you turn your work without putting a final double crochet into the top of that tilted third chain, you decrease your row by one stitch. Turn and do the same thing on the next row, and you lose another stitch on the opposite edge.
Culprit #2: Why Your Blanket Gets Wider (The First-Stitch Double-Up)
What if your blanket is spreading outward like a fan or developing ruffled, flaring edges? In that case, you are correctly working into the turning chain at the end of the row, and also working into the very first stitch at the beginning of the row.
Look closely at the base of your ch 3 right after you turn your work. Directly underneath the turning chain sits the top "V" of the last stitch you just made on the previous row. It is wide open, right in front of your hook, and practically begs you to insert your hook into it.
- When
Ch 3Counts as a Stitch: That first stitch at the base already belongs to thech 3rising out of it. If you work a double crochet into that first stitch and count thech 3as a stitch at the end of the next row, you have placed two stitches into a single base stitch, increasing your blanket by one stitch per row. - When
Ch 2Does NOT Count as a Stitch: Conversely, some modern patterns instruct: "Ch 2 (does not count as a stitch), dc in first stitch." In those patterns, you do work into the first stitch at the base, and you do not work into the turning chain at the end of the next row. Mixing the start rule of one method with the end rule of the other is the fastest way to gain or lose stitches.
Culprit #3: The Parallelogram Effect (Adding on One Side, Dropping on the Other)
Sometimes you count your stitches every ten rows, confirm that you still have exactly 100 stitches, and yet the blanket is leaning diagonally to the left or right like a parallelogram!
How can a blanket lean sideways when the stitch count never changes?
This happens when you consistently add an extra stitch at the beginning of every row (by working into the base of the ch 3 when you should skip it) and simultaneously skip the final turning chain at the end of every row.
- At the start of Row 2, you add 1 stitch (+1).
- At the end of Row 2, you drop 1 stitch (-1).
- Net stitch count change: 0.
Whenever you see your stitch count staying the same while your corners drift sideways, check both the first stitch and the final stitch of your row—they are canceling each other out mathematically while shifting your fabric horizontally.
The Math of Stitch Drift: How One Missed Stitch Ruins a Blanket
Beginners often think, "It is only one stitch at the edge—will anyone really notice?" Because crochet rows stack vertically, losing or gaining one stitch per row compounds linearly across the height of a blanket.
Let us look at a realistic worked example using standard worsted-weight blanket numbers (which you can model for your own gauge using our Crochet Gauge Calculator and Foundation Chain Calculator).
Worked Example: A 36 × 48 Inch Throw Blanket
- Target Dimensions: 36 inches wide × 48 inches long (91 cm × 122 cm).
- Yarn & Hook: Category 4 Medium Worsted yarn with a 5.5 mm (US I-9) hook.
- Blocked Gauge: 14 dc stitches × 8 rows = 4 × 4 inches (3.5 stitches per inch horizontally; 2.0 rows per inch vertically).
- Starting Stitch Count: Starting Stitches = 36 in × 3.5 sts/in = 126 dc stitches
- Total Rows Needed for 48 Inches: Total Rows = 48 in × 2.0 rows/in = 96 rows
Now, suppose you miss the turning chain at the end of every row (losing 1 stitch per row):
Stitches Remaining at Row R = Starting Stitches - (R - 1) × Stitches Lost per Row
Let us trace what happens to your 36-inch blanket every 20 rows:
Progress Milestone | Row Number (R) | Stitches Remaining | Actual Fabric Width (Stitches ÷ 3.5) | Total Width Lost |
|---|---|---|---|---|
Foundation Row | Row 1 | 126 sts | 36.0 inches (91.4 cm) | 0.0 inches |
Quarter Way (10 in) | Row 20 | 107 sts | 30.6 inches (77.7 cm) | -5.4 inches |
Halfway (20 in) | Row 40 | 87 sts | 24.9 inches (63.2 cm) | -11.1 inches |
Three-Quarters (30 in) | Row 60 | 67 sts | 19.1 inches (48.5 cm) | -16.9 inches |
Final Row (48 in) | Row 96 | 31 sts | 8.9 inches (22.6 cm) | -27.1 inches |
By the time you reach Row 96, losing just one stitch per row shrinks a 36-inch throw down to an 8.9-inch scarf strip—wasting three-quarters of your time and yarn!
The Two-Marker Prevention System (Never Count 150 Stitches Again)
Counting 126 or 180 stitches at the end of every row is tedious, and it is easy to lose track when someone speaks to you or the television is on. Fortunately, stitches rarely vanish in the middle of a plain double crochet row unless you physically skip a clear top "V". Most stitch loss happens at the first and last stitch.
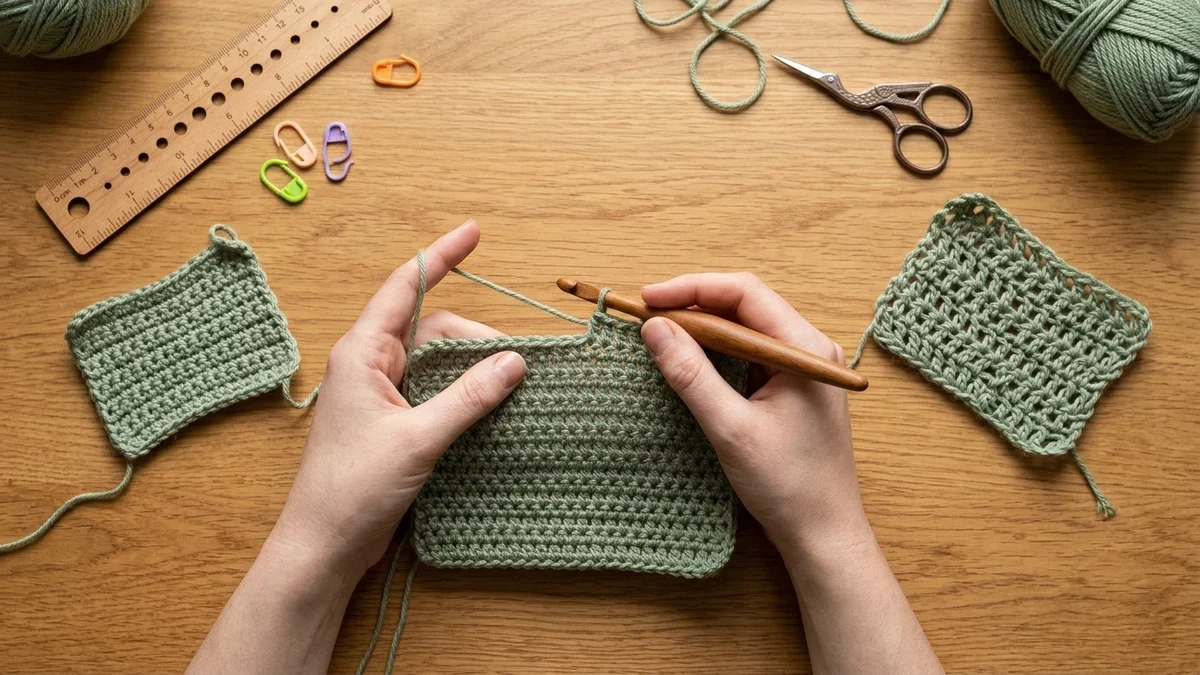
You can eliminate row-end guesswork completely with two locking plastic or metal stitch markers:
- Mark Stitch #1 Immediately: At the start of every row, as soon as you complete your turning sequence—whether that is the 3rd chain of a
ch 3or the top of a Stacked Single Crochet—slip a locking stitch marker under the top two loops of that very first stitch. - Crochet Across Without Counting: Work across the row at a relaxed pace until you reach the stitch marker you placed at the start of the previous row.
- Work Your Final Stitch Into the Marked Loop: That stitch marker is holding open the exact top loops of the final stitch (the top of the previous row's turning chain). Unclip the marker, work your final double crochet right into that marked space, turn your work, make your new first stitch, and clip the marker right back into the new first stitch.
With a marker sitting on both outer edges at all times, you never have to hunt for a tilted chain or wonder whether you have one stitch left. You only need to do a full headcount once every 10 rows as a sanity check.
Can You Fix a Slanted Blanket Without Frogging? (Honest Rescue Thresholds)
What if you are already 30 rows into a blanket and just noticed the width has changed? Do you have to rip ("frog") the entire piece back to the mistake?
As much as we all hate ripping out hours of honest work, no border technique can hide a severe structural taper. Use this practical decision matrix to decide whether to block, border, or frog:
Stitch Count Error | Width Variance (Worsted Yarn) | Recommended Action | How to Execute the Fix |
|---|---|---|---|
Off by 1 to 2 Stitches | Under 0.6 inches (1.5 cm) | Keep Going + Steam/Wet Block | Add or decrease 1 stitch quietly at the edge of the next row to restore your target count, then pin the edges straight during blocking. |
Off by 3 to 5 Stitches | 0.8 to 1.5 inches (2 to 3.8 cm) | Graduated Height Border Rescue | Restore the stitch count on your working row. When adding the final border, work taller stitches ( |
Off by 6+ Stitches | Over 1.75 inches (4.5 cm) | Frog Back to Last Accurate Row | Lay a measuring tape across the blanket every 5 rows from the bottom up to find the exact row where the narrowing began. Rip back only to that row, insert stitch markers, and resume. |
Common Row-Counting Mistakes and How to Avoid Them
If you are using stitch markers on both ends and still finding mysterious extra or missing stitches, check for these three middle-of-the-row traps:
- Splitting the Yarn and Working into a Half-Loop: With loosely plied acrylic or cotton yarns, your hook tip can split a stitch post, pulling up half a strand that looks like an extra "V" on the next row. Choose smooth, tightly plied yarns while practicing, and ensure your hook passes cleanly beneath both strands of the top V.
- Pulling Up on the Working Loop When Setting Your Work Down: If you yank the active loop big so it does not unravel in your project bag, the stitch directly below it often cinches down until its top V disappears into a tiny knot. Always slip a locking stitch marker into your active loop instead of pulling a huge loop that tightens the neighboring stitch.
- Mistaking the Back Bump of the Foundation Chain for an Extra Stitch: On Row 1, twisting the foundation chain can cause you to skip a chain or work twice into the same link. As highlighted by Thread Collective, keeping all the "V" shapes of your starting chain facing you—or working into the back horizontal bumps—ensures Row 1 starts with an accurate baseline.
Frequently Asked Questions
Why is only one side of my blanket slanting while the other side is straight?
Because you turn your work at the end of every row, an error that happens only on one physical side of your blanket means you are making the mistake once every two rows—for example, only when the Right Side (front) is facing you, or only at the end of even-numbered rows. Clip different colored stitch markers onto the Left Edge and Right Edge so you can observe what your hands do differently on odd versus even turns.
Does counting the loop on the hook change my stitch count?
Yes! The active loop sitting on your crochet hook never counts as a chain or a stitch. When counting stitches across a finished row, count the horizontal "V" heads along the top of the row (plus the turning chain if your pattern counts it as a stitch), stopping before the loop currently on your hook.
Why did my blanket get wider on the first two rows even though my stitch count is exact?
A traditional foundation chain has far less horizontal elasticity than rows of full double crochet stitches. It is completely normal for a tight starting chain to pull the bottom edge of a blanket inward by 1 to 2 inches compared to Rows 2 and 3. To stop the bottom edge pulling in without changing your stitch count, either make your starting chain with a hook 0.5 mm to 1.0 mm larger than your working hook, or replace the starting chain with Foundation Double Crochet (FDC).
If I dropped 4 stitches ten rows ago, can I just increase 4 stitches on my current row?
No—if you suddenly add 4 stitches on Row 20 after narrowing between Rows 10 and 19, your blanket will look like an hourglass with a pinched waist in the middle. You must either frog back to Row 10 where the narrowing started, or—if the pinch is very mild (1 to 2 stitches)—restore the count and fill in the slight dip later with taller border stitches.
Conclusion and Next Steps
A narrowing or flaring double crochet blanket is a rite of passage for nearly every crocheter, and once you learn to spot the tilted top loop of a turning chain, it is a mistake you can leave behind for good. Keep two locking stitch markers clipped to the first and last stitches of every row, verify whether your pattern counts the turning chain as a stitch before you start Row 2, and pause every ten rows to lay your fabric flat.
Need help planning or rescuing your current blanket?
- Calculate your exact stitch multiples and target row counts with the Foundation Chain Calculator and Crochet Gauge Calculator.
- Eliminate turning chains altogether by reading our step-by-step guide on How to Get Straight Edges in Double Crochet.


Questions & notes
No comments yet
Sign in or create a free account to comment under your profile and keep track of your replies.
Your email address is never published. Comments are moderated under our Community Guidelines; see our Privacy Policy for how we use your details.