
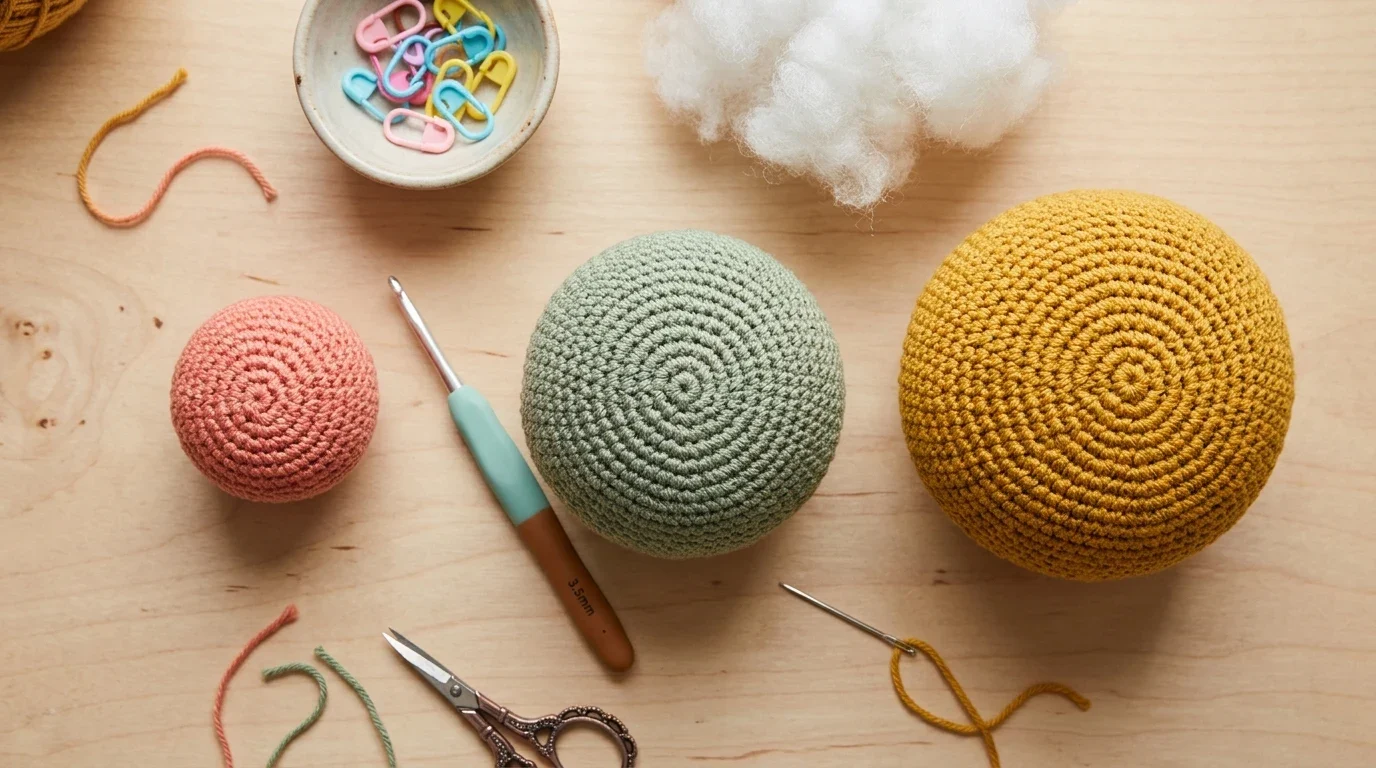
Pattern at a glance
- Hook
- 3.5 mm (US E-4)
- Yarn
- Worsted-weight cotton or acrylic
- Finished size
- About 2.5 in (6 cm) across in worsted yarn
- Gauge
- Tight: no stuffing should show between stitches
- Terms
- US terms
Materials
- Worsted-weight (#4) yarn
- 3.5 mm (US E-4) crochet hookSmaller than usual, for a dense fabric
- Polyester fibrefill stuffing
- Stitch marker and tapestry needle
Abbreviations
- sc
- single crochet
- inc
- 2 sc in the same stitch
- dec
- single crochet two together (invisible decrease)
- st(s)
- stitch(es)
- MR
- magic ring
By the DoubleCrochet Team | Last Updated: November 2026 | Skill Level: Easy / Beginner Amigurumi
An amigurumi ball (crocheted sphere) uses about 22 to 28 yards (20 to 26 m) (estimate) of Category 4 medium worsted-weight yarn and a 3.5 mm (E-4) crochet hook to create a firm 3-inch (7.5 cm) diameter (estimate) sphere worked in continuous spiral rounds (6 sc magic ring → 36 sts over 6 increase rounds → 5 even rounds → 4 invisible decrease rounds back to 6 sts).
Every stuffed crochet animal, doll head, berry, ornament, and stress ball starts with this exact 6-increase geometric formula. Once you understand how to control stitch tension, stagger your increases so the ball looks smoothly round instead of hexagonal, and close the bottom without gaps showing your stuffing, you can scale a crochet sphere to any size—or generate custom round-by-round counts automatically with our sphere calculator.
Crocheting a firm, gap-free sphere with a downsized 3.5 mm hook gives you the core building block for amigurumi heads, bodies, and baby rattles.
Project Specifications & Materials
Finished Size & Gauge
- Finished Diameter (Standard 36-Stitch Ball): Approximately 3 inches (7.5 cm) across (estimate)
- Finished Circumference: Approximately 9.5 inches (24 cm) (estimate)
- Working Gauge:
20 sc × 22 rounds = 4" × 4" (10 × 10 cm)worked tightly in continuous spirals with a 3.5 mm hook (estimate) - Construction Method: Continuous spiral rounds from top pole to bottom pole (do not join rounds with a slip stitch or chain 1 at the start of a round)
Why We Downsize the Hook by 1.5 mm to 2.0 mm: A standard Category 4 worsted yarn label recommends a5.0 mm (H-8)or5.5 mm (I-9)hook for garments and blankets. In amigurumi, a5.0 mmhook leaves spaces between single crochet posts where white polyester stuffing pokes through. Dropping down to a 3.5 mm (E-4) or 3.75 mm (F-5) hook creates a dense, structured fabric that holds its spherical curve without gaps. Check our amigurumi size tool to see how changing your yarn weight and hook size alters the final diameter.
Materials & Tools Needed
- Yarn: Category 4 Medium Worsted-Weight Yarn (100% cotton or smooth anti-pilling acrylic), approx. 22–28 yards (20–26 m) / 12–15 g (estimate) for one 3-inch ball. Smooth yarns with crisp stitch definition make counting spiral rounds much easier for beginners than fuzzy chenille.
- Crochet Hook: 3.5 mm (US E-4) (or 3.25 mm / D-3 if you crochet loosely)
- Stuffing: Polyester fiberfill (Poly-Fil), approx. 0.4–0.5 oz (10–15 g) (estimate)
- Stitch Marker: 1 locking plastic stitch marker (or a contrasting scrap of yarn) to track the first stitch of every spiral round
- Notions: Sharp scissors and a blunt-tipped metal tapestry needle
- Optional Embellishments: Black cotton embroidery floss (for baby-safe stitched eyes) or 8 mm–10 mm plastic safety eyes (for ages 3+ only—see safety guidelines below)
Abbreviations & Stitches Used (US Terms)
This pattern uses US crochet terminology. (In UK terms, a US single crochet (sc) is called a double crochet (dc).)
Abbreviation | Stitch Name (US Terms) | How to Work It in Amigurumi |
|---|---|---|
MR | Adjustable starter loop that cinches the top pole completely shut with zero center hole. | |
sc | Single Crochet | Insert hook under both top loops ( |
inc | Single Crochet Increase | Work |
inv dec | Invisible Decrease | Insert hook into the front loop only ( |
dec (sc2tog) | Standard Decrease | Insert hook under both loops of next stitch, pull up a loop, insert under both loops of following stitch, pull up a loop, yarn over, pull through all 3 loops. (We recommend |
st(s) | Stitch(es) | Total count of |
( ... ) × 6 | Repeat Sequence | Repeat the instructions inside parentheses the stated number of times around the circle. |
Important Child Safety Note: Plastic "Safety Eyes" vs. Embroidered Eyes
Before turning your amigurumi ball into a toy animal head, baby rattle, or sensory ball, choose your eye and facial details based on the recipient's age:

- Under Age 3 (Babies & Toddlers) — Always Embroider: Despite their name, plastic snap-in "safety eyes" are not safe for children under 3 years old. Because crochet is a knitted/looped mesh rather than a tightly woven cloth, a teething baby can stretch the surrounding stitches or bite off the plastic post, creating a severe choking hazard. For baby gifts, always stitch sleeping eyelashes or satin-stitch eyes using cotton embroidery floss or yarn. If you add a rattle or crinkle insert inside the ball, seal it inside a sewn cotton pouch before stuffing so nothing can migrate through the stitches.
- Ages 3+ Only & Display Plushies — Plastic Safety Eyes: If your amigurumi is for an older child or adult collector, snap plastic safety eyes in place between Rounds 8 and 9 (spaced 6 to 7 stitches apart) before you stuff and close the ball. You can dial in the exact eye millimeter size and round placement for any head diameter using our amigurumi proportion and safety eye calculator.
Step-by-Step Technique Guide: 3 Secrets to a Perfect Sphere
1. Continuous Spirals & Moving Your Stitch Marker
Amigurumi spheres are worked in a continuous spiral like a coiled spring. Never slip stitch to join at the end of a round, and never chain 1 to start a new round—doing so creates a diagonal scar down the side of your ball. Instead, work the first stitch of Round 2 directly into the first stitch of Round 1, clip your locking stitch marker into that first stitch, and move the marker up at the start of every round.

2. Stacked vs. Staggered Increases (How to Avoid Hexagonal Corners)
When you increase by 6 stitches every round using the standard beginner formula ([sc, inc], [2 sc, inc], [3 sc, inc], [4 sc, inc]), every single increase lands directly on top of the previous round's increase. By Round 6, those 6 stacked increase points form noticeable hexagonal corners.

To make a smooth, truely round sphere, split the first repeat in half on even-numbered increase and decrease rounds (Rounds 4, 6, 12, and 14):
- Standard Round 4 (
24 sts):(2 sc, inc) × 6 - Staggered Round 4 (
24 sts):1 sc, inc, (2 sc, inc) × 5, 1 sc - Standard Round 6 (
36 sts):(4 sc, inc) × 6 - Staggered Round 6 (
36 sts):2 sc, inc, (4 sc, inc) × 5, 2 sc
We provide both options side by side in the pattern below so you can follow whichever rhythm you prefer!
3. Working the Invisible Decrease (inv dec)
A standard single crochet decrease (sc2tog) pulls up loops under all 4 top strands of two stitches, creating a thick bump and a horizontal gap where white stuffing peeks out. The invisible decrease (inv dec) solves this completely:

- Insert your hook from front to back under the front loop only (
FLO) of the next stitch (do not yarn over yet). - Immediately swing your hook tip into the front loop only (
FLO) of the second stitch right beside it. You now have 3 loops on your hook (your working loop plus 2 front loops). - Yarn over and pull through the first 2 loops on your hook (the two front loops).
- Yarn over and pull through the remaining 2 loops on your hook. The unworked back loops fold neatly inside the sphere, leaving an indistinguishable single crochet
Von the outside.
Written Pattern: Standard 3-Inch Amigurumi Ball (36 Stitches)
Work in continuous spiral rounds without joining. Move your stitch marker to the first stitch of each round.
Phase 1: Top Hemisphere (Increase Rounds)
- Round 1: Start with a magic ring, work
6 scinto ring, pull tail tight to close center hole. (6 sts) - Round 2:
(inc) × 6around. (12 sts) - Round 3:
(sc, inc) × 6around. (18 sts) - Round 4:
- Standard Repeat:
(2 sc, inc) × 6around. (24 sts) - Rounder Staggered Option:
1 sc, inc, (2 sc, inc) × 5, 1 sc. (24 sts)
- Standard Repeat:
- Round 5:
(3 sc, inc) × 6around. (30 sts) - Round 6:
- Standard Repeat:
(4 sc, inc) × 6around. (36 sts) - Rounder Staggered Option:
2 sc, inc, (4 sc, inc) × 5, 2 sc. (36 sts)
- Standard Repeat:
Phase 2: Equator Body (Even Rounds)
- Rounds 7–11 (5 rounds total):
scin each st around. (36 sts per round)- Tip: After Round 8, if your work is curling "wrong side out" (looking like horizontal dashed bars on the outside with the yarn tail sticking out of the bowl), push the center of the bowl with your thumbs so the neat
Vstitches face the outside ("noodles stay inside the bowl"). - Optional Eyes (Ages 3+ Only): If making an animal head for ages 3+, insert plastic safety eyes between Rounds 8 and 9 now, spaced 6–7 stitches apart.
- Tip: After Round 8, if your work is curling "wrong side out" (looking like horizontal dashed bars on the outside with the yarn tail sticking out of the bowl), push the center of the bowl with your thumbs so the neat
Phase 3: Bottom Hemisphere (Decrease Rounds & Stuffing)
- Round 12:
- Standard Repeat:
(4 sc, inv dec) × 6around. (30 sts) - Rounder Staggered Option:
2 sc, inv dec, (4 sc, inv dec) × 5, 2 sc. (30 sts)
- Standard Repeat:
- Round 13:
(3 sc, inv dec) × 6around. (24 sts) - Round 14:
- Standard Repeat:
(2 sc, inv dec) × 6around. (18 sts) - Rounder Staggered Option:
1 sc, inv dec, (2 sc, inv dec) × 5, 1 sc. (18 sts) - Stuffing Step: Pause here while the opening is still 18 stitches wide (~1.25 inches across). Tear your polyester fiberfill into small, marble-sized tufts and pack them firmly inside, pressing outward against the equator walls to mould a smooth sphere. Do not overstuff so high that wisps of fiberfill get caught in your hook during Round 15.
- Standard Repeat:
- Round 15:
(sc, inv dec) × 6around. (12 sts)- Top-Up Stuffing: Add one final pinch of fiberfill into the center cavity if needed.
- Round 16:
(inv dec) × 6around. (6 sts)
Phase 4: The "Ultimate Finish" (Closing Without a Bump)
- Cut the yarn leaving an 8-inch (20 cm) tail. Pull the loop on your hook straight up until the tail comes through to secure the last stitch.
- Thread the tail onto your tapestry needle.
- Insert the needle from front to back under the Front Loop Only (
FLO) of each of the remaining 6 stitches around the hole, one after another. - Pull the yarn tail firmly—just like tightening a drawstring bag, the 6 front loops will cinch completely shut with no raised bump or dimple.
- Insert the needle straight into the center of the closed ring and push it all the way out the opposite side of the ball. Pull gently to sink the knot inside the stuffing, then snip the yarn flush with the surface.
Multi-Size Amigurumi Ball Formula & Yardage Chart
Every standard crochet sphere follows the same geometric rule:
- Increase Rounds ($N$): Start with
6 scand add6 stsper round for $N$ rounds until the flat circle matches your desired ball diameter. - Even Middle Rounds ($N - 1$ to $N$): Work even rounds (
scin each stitch around) equal to[Total Increase Rounds - 1](for standard Yarn Over stitches) or[Total Increase Rounds](if you use tighter Yarn Under stitches, which are slightly shorter in height). - Decrease Rounds ($N - 1$): Mirror the increase rounds in reverse using
inv decback down to6 sts.
Use the table below to make spheres in 5 graduated sizes using Category 4 worsted yarn and a 3.5 mm hook (or compute custom counts up to 200+ stitches with our sphere calculator):
Sphere Size | Max Circumference Stitches | Increase Rounds (Top) | Even Middle Rounds ( | Decrease Rounds (Bottom) | Total Rounds | Est. Finished Diameter (estimate) | Est. Worsted Yardage & Stuffing (estimate) |
|---|---|---|---|---|---|---|---|
Mini (Berry / Pom) | 18 sts ( | Rds 1–3 (3 rds) | Rds 4–5 (2–3 rds) | Rds 6–7 (2 rds to 6 sts) | 7–8 rds | ~1.5 in (3.8 cm) (estimate) | ~7–9 yds / 3 g stuffing (estimate) |
Small (Golf Ball) | 24 sts ( | Rds 1–4 (4 rds) | Rds 5–8 (3–4 rds) | Rds 9–11 (3 rds to 6 sts) | 11–12 rds | ~2.25 in (5.7 cm) (estimate) | ~14–17 yds / 7 g stuffing (estimate) |
Standard (Tennis Ball) | 36 sts ( | Rds 1–6 (6 rds) | Rds 7–11 (5–6 rds) | Rds 12–16 (5 rds to 6 sts) | 16–17 rds | ~3.0 in (7.5 cm) (estimate) | ~22–28 yds / 14 g stuffing (estimate) |
Large (Softball / Head) | 48 sts ( | Rds 1–8 (8 rds) | Rds 9–15 (7–8 rds) | Rds 16–22 (7 rds to 6 sts) | 22–23 rds | ~3.75 in (9.5 cm) (estimate) | ~42–50 yds / 28 g stuffing (estimate) |
Jumbo (Plush Toy Body) | 60 sts ( | Rds 1–10 (10 rds) | Rds 11–19 (9–10 rds) | Rds 20–28 (9 rds to 6 sts) | 28–29 rds | ~4.5 in (11.5 cm) (estimate) | ~70–85 yds / 50 g stuffing (estimate) |
Creative Variations: How to Modify the Basic Sphere
Once you know the 36-stitch sphere formula, small tweaks to the middle or decrease rounds create every other amigurumi shape:
- Egg or Oval Shape (Chubby Bird Body): Work Rounds 1–11 exactly as written (
36 sts), then insert 1 even round (36 sc,30 sc,24 sc) between each decrease round on the second half. Slowing down the taper stretches one pole into a smooth egg. - Teardrop or Pear Shape (Amigurumi Torso): Start with the 18-stitch or 24-stitch circle at the top, add increase rounds spaced 2–3 even rounds apart until you reach
36 stsnear the bottom, then work standard every-round decreases to flatten the base. - Flat-Bottomed Sit-Up Sphere (Roly-Poly Toy): Work a piece of plastic canvas cut to the diameter of Round 4 (
24 sts) into the base before closing, or work the final decrease round in Back Loops Only (BLO) so the bottom sits flat on a shelf without rolling away. - Super-Bulky Chenille Plush Ball: Swap the worsted yarn and 3.5 mm hook for Category 6 Super Bulky chenille/velvet yarn and a 5.0 mm (H-8) hook. Follow the exact same 16-round pattern to turn a 3-inch palm ball into an 6.5- to 7-inch (estimate) huggable plush sphere! (Tip: With fuzzy chenille, start Round 1 with
ch 2, work 6 sc in 2nd ch from hookif the magic ring tail snaps when pulled tight.)
Common Mistakes & Troubleshooting
1. "My ball looks like a pointy lemon or beehive at the top and bottom poles."
- Cause: Starting with fewer than
6 scin the magic ring, or working too few even rounds in the middle combined with loose tension. - Fix: Always start with 6 single crochets in Round 1 for a sphere. After stuffing, roll the finished ball firmly between your palms like a ball of dough—this redistributes the polyester fiberfill into the equator and rounds out pointy poles immediately.
2. "White stuffing is showing through holes on the bottom half of my ball."
- Cause: Using regular
sc2togdecreases, overstuffing until the stitches are stretched taut, or letting your tension loosen on the last 4 rounds. - Fix: Switch to the invisible decrease (
inv dec) through the front loops only, hold the working yarn snuggled tightly against the hook shank during Rounds 12–16, and stop stuffing about 10% before the fabric feels drum-tight.
3. "My ball is wider and flatter than a sphere (looks like a hamburger bun or pumpkin)."
- Cause: Too few even rounds in the middle section for your stitch height—especially common if you use the Yarn Under (
YU) technique, which produces shorter, tighter X-shaped stitches than standard Yarn Over (YO) V-stitches. - Fix: Add 1 extra even round (
scaround) to Phase 2 (for example, work Rounds 7–12 = 6 even rounds instead of 5 for a 36-stitch ball).
Frequently Asked Questions (FAQ)
Do you join rounds when crocheting an amigurumi ball?
No. Amigurumi balls are almost always crocheted in continuous spiral rounds without slip-stitch joins or starting chains. Joining each round leaves a visible vertical ridge down one side of the sphere. Instead, clip a locking stitch marker into the first stitch of each round and move it up as you go.
What is the best yarn and hook size for a beginner amigurumi ball?
A smooth Category 4 medium worsted-weight cotton or acrylic yarn paired with a 3.5 mm (E-4) crochet hook is the easiest combination for beginners. Light, bright colors (such as sage green, coral, yellow, or sky blue) let you see every front and back loop clearly, whereas black or dark navy yarn makes counting spiral stitches difficult.
Why do you start an amigurumi ball with 6 single crochets in the magic ring?
In single crochet geometry, a flat circle requires 6 stitches added per round (6, 12, 18, 24, 30, 36) so the circumference expands at 2π times the height of one single crochet stitch. Starting with 8 stitches (hdc rate) causes a single crochet circle to ruffle like a lettuce leaf, while starting with 4 stitches forces it into a pointy cone.
Can I wash a stuffed crochet ball in the washing machine?
Yes, if you use machine-washable cotton or acrylic yarn and 100% polyester fiberfill stuffing. Place the crochet ball inside a mesh laundry bag, wash on a gentle cold cycle, and air-dry thoroughly (or tumble dry on air-fluff/no heat with clean tennis balls) so moisture does not stay trapped in the center of the stuffing.
How do I calculate the rounds for a giant amigurumi ball?
Measure how many single crochet stitches you get per inch on your swatch, multiply your target diameter by 3.14 (π) to find the equator circumference in inches, and round to the nearest multiple of 6. Or simply enter your gauge and desired diameter in our sphere calculator to generate the exact round-by-round pattern automatically.


Questions & notes
No comments yet
Sign in or create a free account to comment under your profile and keep track of your replies.
Your email address is never published. Comments are moderated under our Community Guidelines; see our Privacy Policy for how we use your details.