How to Get Straight Edges in Double Crochet: 3 Reliable Turning Methods Compared
Why the chain-3 turn leaves gaps and bumps at the edge, and three turning methods that give double crochet clean, straight sides.

17 min read
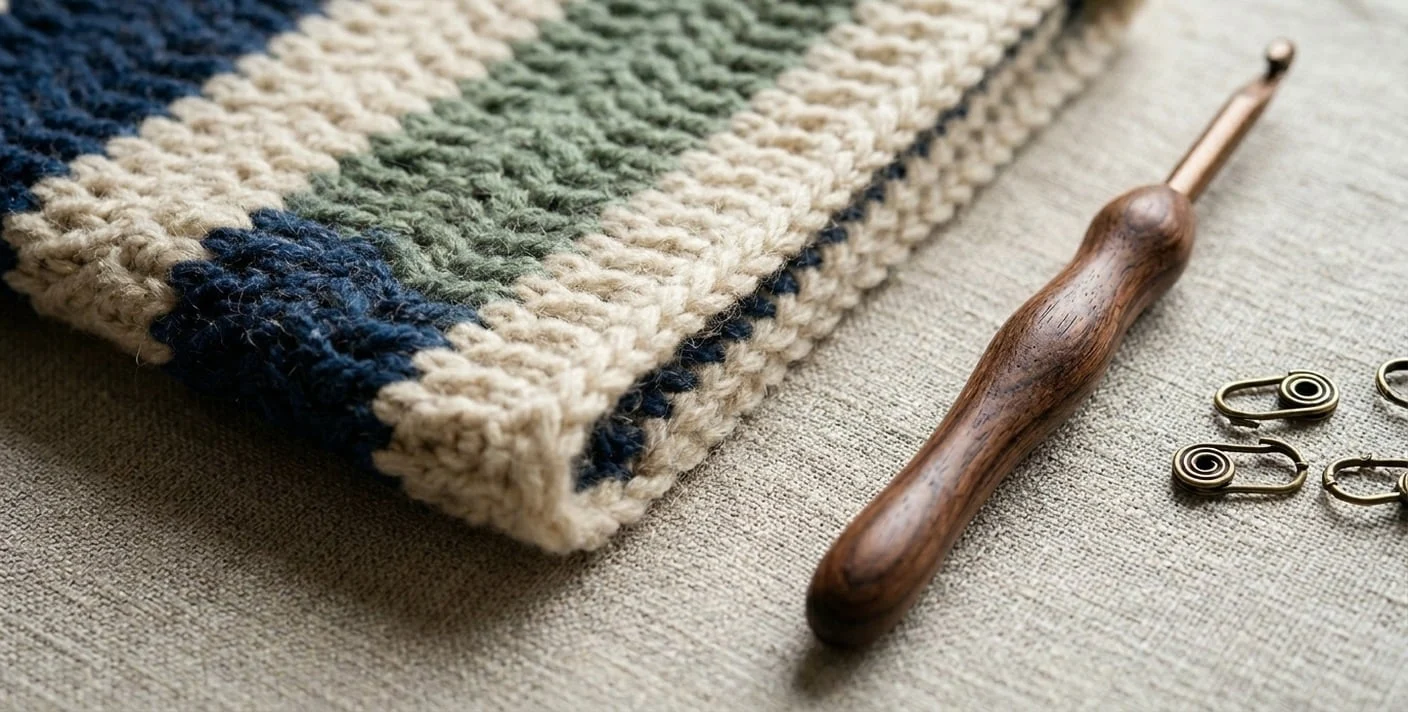
Nothing pulls the eye away from a beautifully stitched blanket quite like a bumpy, scalloped, or perforated side edge. You can keep your stitch tension steady across the entire width of a throw, count every stitch faithfully, and still look down after twenty rows to find a line of prominent holes along one margin and a row of bulging loops along the other. When you lay the piece flat on the living room table, the sides look more like a rickrack ribbon than a clean frame.
If this happens to your double crochet projects, your hands are not the problem. The culprit is almost always the traditional instruction printed in nearly every beginner pattern book: "Chain 3 (counts as first double crochet), turn."
While a three-chain turning sequence gets your hook up to the approximate height of a new row, three simple chain stitches do not share the same width, density, or structural anchor as a true double crochet post. In this guide, we will look at why the standard turning chain misbehaves, walk step by step through three reliable alternatives—the Stacked Single Crochet, the Uncounted Tight Chain-2, and the Chainless Starting Double Crochet—and work through a practical swatch example so you can choose the cleanest edge for your yarn and project.
Terminology Note: US Double Crochet vs. UK Treble Crochet
Before we adjust a single loop on your hook, let us make sure we are speaking the same stitch language. This guide uses US crochet terminology, where a double crochet (dc) begins with one yarn-over and is completed by pulling through two loops twice. In UK crochet terminology, this exact same stitch is called a treble crochet (tr). If you are working from a British or Australian pattern, apply every technique below wherever your pattern calls for a treble crochet row start. (If you ever need to double-check a pattern's region, keep our US vs. UK Crochet Terms Guide bookmarked nearby.)
Why Traditional Chain-3 Turning Chains Cause Bumps and Holes
To understand why a three-chain turning pillar creates a wavy border, look closely at the anatomy of a standard US double crochet stitch compared to three chain stitches stacked in a column:
- Width Discrepancy: A standard double crochet stitch wraps yarn around the post as you pull through two loops twice, giving the post a plump, cylindrical body. Three chain stitches are flat, narrow links. Because the chain column is skinnier than a true stitch and sits slightly to the outside of the first stitch's base, a daylight gap opens up between the turning chain and the second double crochet of the row.
- Skipped First Stitch Base: When a pattern instructs you to treat the
ch 3as your first stitch, you must skip the very first stitch at the base of the row and work your next double crochet into the second stitch. That skipped first stitch leaves an unworked horizontal gap right at the corner of the turn. - Bow-Out on the Subsequent Row: On the following row, you have to work your final double crochet into the third chain of that turning chain. Finding the exact center of a chain stitch is fiddly; inserting your hook under only one thin strand pulls that strand outward into a pointed picot bump.
- Direction of Turn: Whether you turn your work clockwise (like turning the page of a book) or counterclockwise changes whether the working yarn wraps around the outside of the chain or tucks neatly to the inside. Turning the wrong way after chaining pushes the chain column outward beyond the selvedge line.
According to troubleshooting guidance from Make & Do Crew, the turning chain is one of the most common sources of both edge distortion and accidental stitch-count errors in double crochet rows. Fortunately, you are never obligated to use a standard ch 3 just because a pattern prints it. As long as your replacement produces the same vertical height and maintains the exact stitch count of the row, you can swap in a cleaner turning technique on almost any project.
Method 1: The Stacked Single Crochet (Stsc) — The Cleanest Structural Edge
If you want a side edge that looks almost identical to a woven selvedge, the Stacked Single Crochet (abbreviated Stsc) is the gold standard. Instead of chaining at the start of a new row, you work a single crochet directly into the first stitch, and then work a second single crochet into the side post of the first one.
Because you are building two stacked single crochet stitches directly inside the first stitch of the row, there is no skipped stitch at the base, no gap between the first and second stitches, and a full, unmistakable top "V" loop waiting for your hook when you return at the end of the next row.

Step-by-Step Instructions for Stacked Single Crochet (Right-Handed)
- Turn Your Work First (Do Not Chain): When you finish the final double crochet of your row, turn your work immediately without making any chain stitches. Pull the active loop on your hook just barely snug—about the normal size of a working loop.
- Work a Standard Single Crochet in the First Stitch: Insert your hook under both top loops (the full "V") of the very first stitch at the edge. Yarn over, pull up a loop (two loops on hook), yarn over, and pull through both loops. You now have one single crochet sitting at the base of the row.
- Locate the Left Vertical Bar: Look at the front face of the single crochet you just completed. You will see two vertical legs forming a "V" on the post of the stitch. Identify the left vertical bar (if you are left-handed, identify the right vertical bar).
- Insert Your Hook into the Vertical Bar: Insert your hook from right to left underneath that left vertical bar. (For extra stability with slippery yarns like bamboo or mercerized cotton, you can insert your hook under both the left vertical bar and the tiny horizontal back bar right behind it.)
- Complete the Second Single Crochet: Yarn over and pull up a loop through the vertical bar (two loops on hook). Yarn over and pull through both loops.
- Continue Across the Row: Your Stacked Single Crochet is complete and counts as the first double crochet of the row. Work your next regular double crochet into the second stitch of the row and continue across.
- Working into the Stsc on the Next Row: When you reach the end of the next row, you will not be hunting for a tight third chain. The top of the Stacked Single Crochet has a normal, full-sized horizontal "V" just like every other stitch. Work your final double crochet right under both loops of that top V.
When to Choose Stacked Single Crochet
- Exposed Blanket Borders: Ideal for modern throws, scarves, and dishcloths that will not receive a heavy multi-round border.
- Garment Seams: Because the top and side loops are uniform, mattress-stitching two double crochet sweater panels together becomes effortless.
- Color Stripes: Eliminates the jagged stair-step notch where one color ends and the next row turns.
Method 2: The Tight Uncounted Chain-2 — Fast and Gap-Free
Sometimes you want a rhythm that feels almost identical to traditional crocheting without pausing to insert your hook into a vertical bar. The Tight Uncounted Chain-2 method solves the turning-chain gap by stripping the turning chain of its status as a stitch.
In this method, you chain only two (slightly firmer than usual), ignore those two chains completely when counting your stitches, and work a true double crochet straight into the very first stitch at the base of the row.
Step-by-Step Instructions for the Uncounted Chain-2
- Chain 2 Firmly and Turn: At the end of your row, make 2 chain stitches with slightly firmer tension than your normal chains, then turn your work counterclockwise (so the working yarn wraps neatly toward the back of the work rather than bowing the chain outward).
- Work a Full Double Crochet into the Very First Stitch: Yarn over and insert your hook into the very first stitch of the row—the exact stitch directly underneath your chain-2. Complete a standard double crochet.
- Treat the Chain-2 as Invisible: The tight chain-2 hugs the outer side of that first real double crochet like a thin supporting splint. It does not count as a stitch. Your first real double crochet is Stitch #1.
- Work Across the Row: Continue working one double crochet into each stitch across the row.
- Skip the Chain-2 on the Return Row: When you reach the end of the next row, work your final double crochet into the top "V" of that first real double crochet from the row below. Do not work into the tight chain-2 sitting tucked against its outer edge.
The Golden Rule of the Uncounted Chain-2
Because the chain-2 does not count as a stitch, it is tempting when you are tired to accidentally work an extra double crochet into the top of the chain-2 at the end of the following row. If you do that, you will add one stitch per row and your project will flare outward. When learning this method, clip a locking stitch marker into the top V of your first real double crochet right after you make it. When you come back across on the next row, your last stitch goes into the marked V, and you ignore the tiny chain tucked beside it.
Method 3: The Chainless Starting Double Crochet (CSDC)
Also known in crochet communities as the Alternative Turning Stitch or False Double Crochet, the Chainless Starting Double Crochet uses an elongated loop wrapped around the hook to simulate a twisted double crochet post without making chains or single crochets.
Step-by-Step Instructions for the CSDC
- Turn Your Work First: Finish your row and turn your work without chaining.
- Pull Up a Tall Loop: Gently pull the active loop on your hook upward until it matches the exact height of your regular double crochet stitches (typically about 0.5 to 0.75 inches / 1.3 to 1.9 cm for medium worsted yarn).
- Anchor the Loop with Your Index Finger: Press your index finger (of your hook hand) firmly against the top of that elongated loop on the hook shaft so it cannot slip or spin freely.
- Wrap the Hook Around the Loop (Simulated Yarn-Over): Keeping your finger pinned on the loop, swing the tip of your hook forward, underneath, and up behind the elongated loop. The elongated loop is now twisted around your hook shaft, acting as a yarn-over.
- Insert Hook into the First Stitch: Insert your hook into the very first stitch at the base of the row. Yarn over and pull up a loop. You will have three groupings on your hook (the working loop, the middle twisted loop, and the anchored top loop).
- Complete as a Double Crochet: Yarn over and pull through the first two loops on your hook. Yarn over and pull through the remaining two loops.
Pros and Cons of the CSDC
The CSDC creates a remarkably soft, twisted edge that blends well into airy shawls and garments. However, it requires practice to keep the initial pulled-up loop at a consistent height row after row, and the top loop can feel slightly tight when you work into it on the return pass unless you keep your finger pressure relaxed during Step 6.
Side-by-Side Comparison of Double Crochet Turning Methods
Every project has different priorities. Use this comparison table to select the right turning method for what is currently on your hook:
Turning Method | Counts as a Stitch? | Eliminates Edge Gap? | Outer Profile | Best Project Applications | Key Watch-Out |
|---|---|---|---|---|---|
Traditional Chain-3 ( | Yes (1st dc) | No (leaves visible hole) | Slightly scalloped with small gaps | Lace shawls, mesh patterns, or blankets receiving a thick border | Working under only 1 loop of the 3rd chain pulls a pointy bump outward |
Stacked Single Crochet ( | Yes (1st dc) | Yes (solid) | Flat, crisp, woven-look selvedge | Modern blankets, exposed scarf edges, seamed sweater panels | Inserting into the wrong vertical bar tilts the stitch slightly |
Tight Uncounted | No (ignored) | Yes (fills the corner) | Smooth, slightly rounded edge | Fast solid throws, baby blankets, everyday washcloths | Must not work into the |
Chainless Starting DC ( | Yes (1st dc) | Yes (twisted post) | Soft, organic twisted post | Drapey cardigans, fine-weight wraps, variegated yarns | Top V can tighten down if you pull the anchored loop too hard |
Practical Swatch Example: Calculating Foundation Chains and Row Counts
When you switch from a traditional ch 3 to one of the straight-edge methods above, does your starting foundation chain change? Let us walk through a concrete mathematical example so you never start a blanket with the wrong stitch count.
Scenario Inputs
Suppose you are making a baby blanket that needs to be 30 inches (76 cm) wide using Category 4 Medium Worsted yarn and a 5.5 mm (US I-9) hook.
- Your blocked gauge swatch measures 14 double crochet stitches and 8 rows per 4 inches (10 cm).
- That gives a horizontal stitch gauge of: Stitches per Inch = 14 sts ÷ 4 in = 3.5 sts/in
- To reach a finished width of 30 inches, your target row stitch count is: Target Stitches = 30 in × 3.5 sts/in = 105 double crochet stitches per row
(You can run these exact numbers for any yarn and width in seconds using our Crochet Gauge Calculator or our dedicated Foundation Chain Calculator.)
How Your Starting Chain Changes by Method
- Standard Foundation Chain (Traditional
Ch 3Counts as Stitch):
When working Row 1 into a standard chain where the skipped chains count as the first double crochet, the formula is:
Foundation Chain = Target Stitches + 2 = 105 + 2 = 107 chains
Why + 2 instead of + 3? Because when you work your first double crochet into the 4th chain from the hook, the 3 skipped chains count as Stitch #1, the 4th chain holds Stitch #2, and the remaining 103 chains hold Stitches #3 through #105 (1 + 1 + 103 = 105 stitches).
2. Switching to Stacked Single Crochet or CSDC on Row 2 Forward:
You still chain 107 for your foundation chain and work Row 1 normally (or work 105 Foundation Double Crochets to skip the chain entirely). Starting on Row 2, every Stacked Single Crochet simply replaces the ch 3 and counts as Stitch #1 of your 105 stitches.
3. Using the Uncounted Chain-2 Method from Row 1:
If you want to use an uncounted turning chain from the very first row, you chain:
Foundation Chain = Target Stitches + 2 = 105 + 2 = 107 chains
Then work your first double crochet into the 3rd chain from the hook (ignoring the 2 skipped chains), which yields exactly 105 real double crochet stitches across Row 1.
How to Diagnose Whether Your Edge Issue Is Turning Mechanics or Stitch Count
Before blaming your turning chain for every irregular border, lay your project flat on a table and inspect the silhouette of both sides:
- Parallel but Bumpy or Gapped: If the top row of your blanket is the exact same width as the bottom row (and has the exact same number of stitches), but the left and right margins have little loops or keyholes every two rows, your issue is turning-chain mechanics. Switching to the Stacked Single Crochet (Method 1) or Uncounted Chain-2 (Method 2) will solve it immediately.
- Slanting Inward or Flaring Outward: If the blanket is gradually narrowing like a pyramid or widening like a fan, your issue is stitch-count drift—meaning you are either failing to work into the final stitch of the row or accidentally adding an extra stitch into the base of the turning chain. If you see your blanket narrowing or flaring, read our companion diagnostic guide, Why Is My Crochet Blanket Turning into a Triangle?.
Common Mistakes That Ruin Double Crochet Edges (And How to Fix Them)
Even when using an upgraded turning stitch, a few subtle habits can still distort your selvedge:
1. Working Under Only One Strand of the Turning Chain
- Why It Happens: When using a traditional
ch 3, many crocheters poke their hook under only the top horizontal loop of the third chain at the end of the next row. - The Result: That single strand stretches upward and outward under the weight of the new stitch, creating a wide teardrop hole and a pointy bump.
- The Fix: Always insert your hook under two strands of the third chain—specifically the top loop and the back bump (leaving only the bottom front leg below your hook). Better yet, switch to the Stacked Single Crochet so you always have a true two-loop "V" to work into.
2. Chaining Before Turning vs. Turning Before Chaining Inconsistently
- Why It Happens: Halfway through a project, you set the blanket down to make dinner. When you pick it back up, you sometimes chain and turn clockwise, and other times turn counterclockwise.
- The Result: Clockwise turns twist the yarn around the outside of the edge; counterclockwise turns fold the yarn to the inside. Mixing the two makes alternate rows stick out at different angles.
- The Fix: Build a single muscle-memory habit. If you use Stacked Single Crochet, always turn your work before making the stitch, and turn in the same direction (like turning a page in a book) every single row.
3. Pulling the First Loop Too Tight After Turning
- Why It Happens: In an effort to keep edges neat, crafters often tug the working yarn tightly right as they turn the row.
- The Result: The outer edge cinches vertically, making the first stitch shorter than the rest of the row and causing the border of the blanket to pucker inward.
- The Fix: Let the loop on your hook relax to the full diameter of the hook shaft before beginning your Stacked Single Crochet or Chain-2.
Frequently Asked Questions
Can I switch from a Chain-3 to a Stacked Single Crochet halfway through a blanket?
Yes, you can, and your stitch count will remain identical because both the ch 3 and the Stacked Single Crochet count as one double crochet stitch. However, you will see a visible difference in the side profile between the lower half (which will have tiny edge gaps) and the upper half (which will be solid and flat). If you plan to add a single crochet border around the blanket at the end, the border will blend the transition well; if the edges will remain unbordered, it is best to start a new section or new project with the Stacked Single Crochet from Row 1.
Does the Stacked Single Crochet work for treble crochet or half double crochet too?
Absolutely. For half double crochet (US hdc), a single regular single crochet (or a chainless starting hdc) matches the shorter height without needing a second stacked stitch. For treble crochet (US tr), you simply add one more level: work your first single crochet in the base stitch, work a second single crochet into its left vertical bar, and then work a third single crochet into the left vertical bar of the second stitch.
Should I chain 2 or chain 3 if I still prefer traditional turning chains?
Many crocheters find that a chain 2 matches the actual height of their double crochet stitches much better than a chain 3. Because three chains are slightly taller than a typical double crochet post, a ch 3 gets compressed when the next row is stacked on top of it, forcing it to buckle outward into a bump on the side of the blanket. Testing a ch 2 (and clipping a stitch marker into the 2nd chain so you can find it on the way back) is the simplest way to flatten a traditional chain edge.
How do I keep straight edges when working double crochet with color changes?
When changing colors at the very end of a row, complete the final yarn-over and pull-through of the last double crochet using the new color, then turn your work and work a Stacked Single Crochet in the new color—or fasten off the old color and join the new color with a Standing Double Crochet so there are zero slip-stitch bumps along the edge.
Conclusion and Next Steps
Straight, professional double crochet edges do not require robotic tension or years of practice—they simply require replacing a flawed turning-chain habit with a stitch structure that actually supports the corner of your row. For crisp, gap-free borders that look clean even without edging, the Stacked Single Crochet is well worth the five minutes it takes to learn. For fast, mindless everyday rows, the Tight Uncounted Chain-2 closes the corner hole while keeping your hook moving at top speed.
Ready to put these straight-edge techniques to work on your next project?
- Calculate your exact starting chain and row count with our free Foundation Chain Calculator and Crochet Gauge Calculator.
- If your edges are slanting inward or outward despite clean turns, head over to our next guide on Finding and Fixing Missing Stitches in Double Crochet Blankets.


Questions & notes
No comments yet
Sign in or create a free account to comment under your profile and keep track of your replies.
Your email address is never published. Comments are moderated under our Community Guidelines; see our Privacy Policy for how we use your details.